Registration and password recovery on the EDIN Network platform
Зміст:
1 Authorization
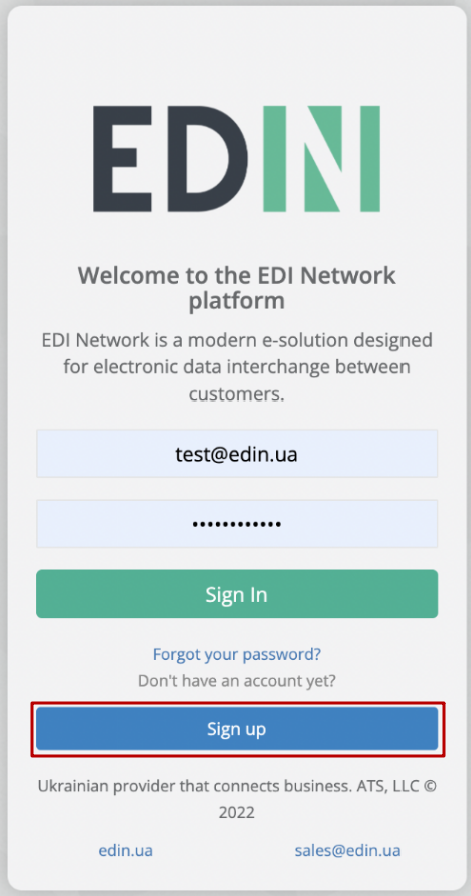
To start work with the EDIN Network platform, you need to log in (https://edo-v2.edin.ua/auth). Already registered users need to enter login (email) and password (set at Registration or Recovery/change password) and press “Sign in”:

2 Registration
User registration is the first step to gaining access to the EDIN Network platform. To register on the platform, click the “Sign up” button or follow the link link:
Fill in the following data:
Email - in the future it will be used as a login for sign in
Password and password confirmation - enter your password, password must be at least 8 characters long.
Agree to the offer and privacy policy - set the checkbox
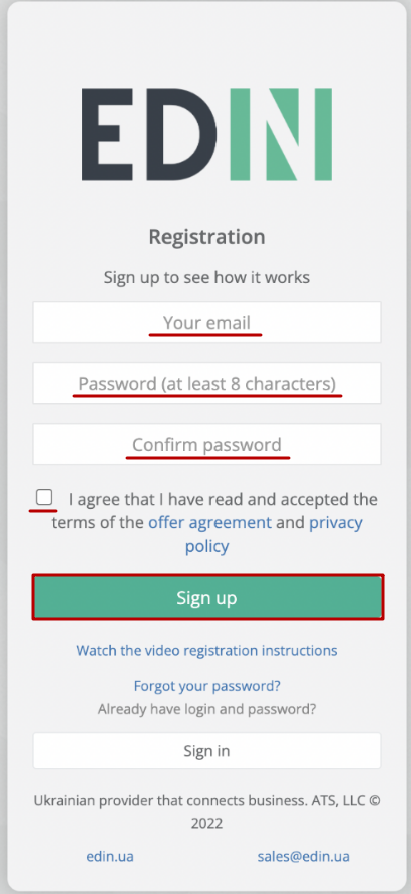
To continue registration, click “Sign up”. An email will be sent to the specified email:
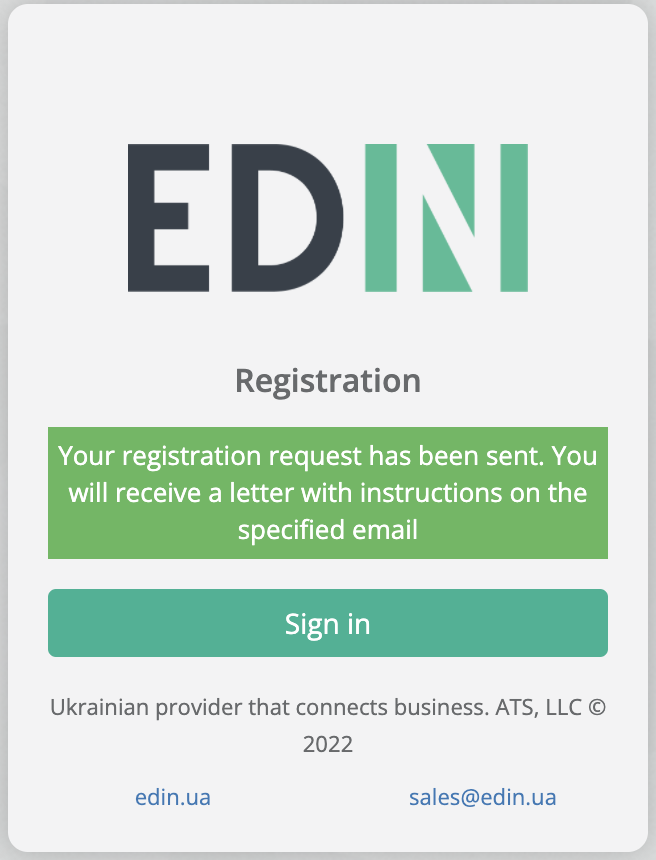
Wait for the email confirmation email.
Attention
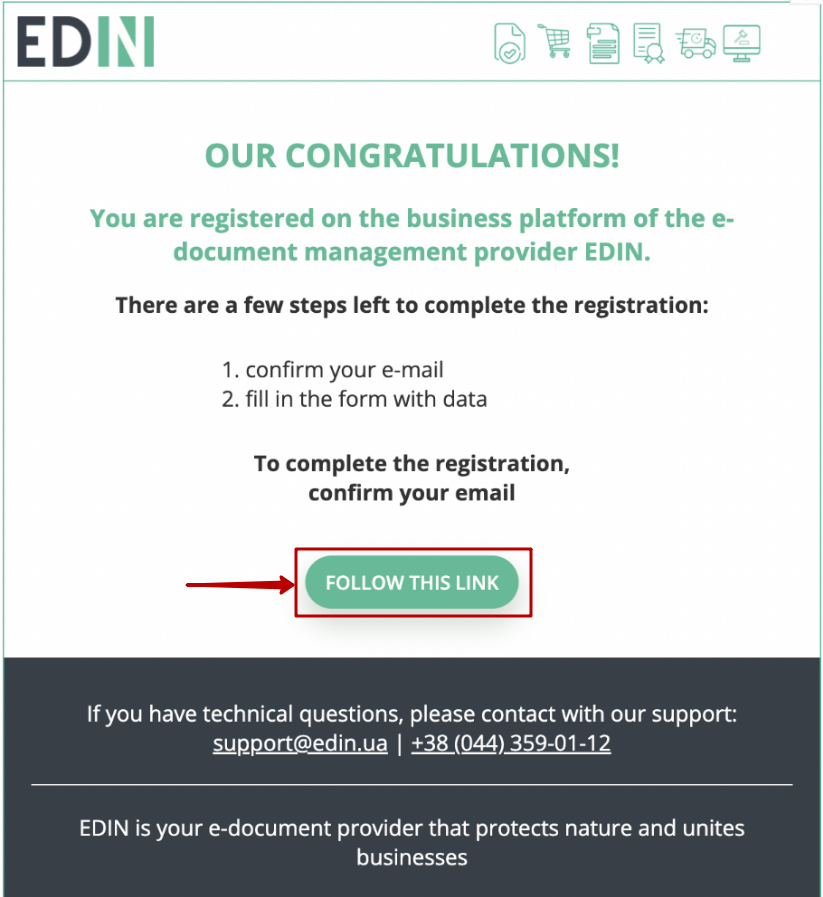
The letter could be spam. Therefore, check not only “Inbox”, but also “Spam”. In case of spam, set the rules so that subsequent emails from EDIN do not get spammed.
After receiving the letter, follow the link in it to confirm the email:
Hint
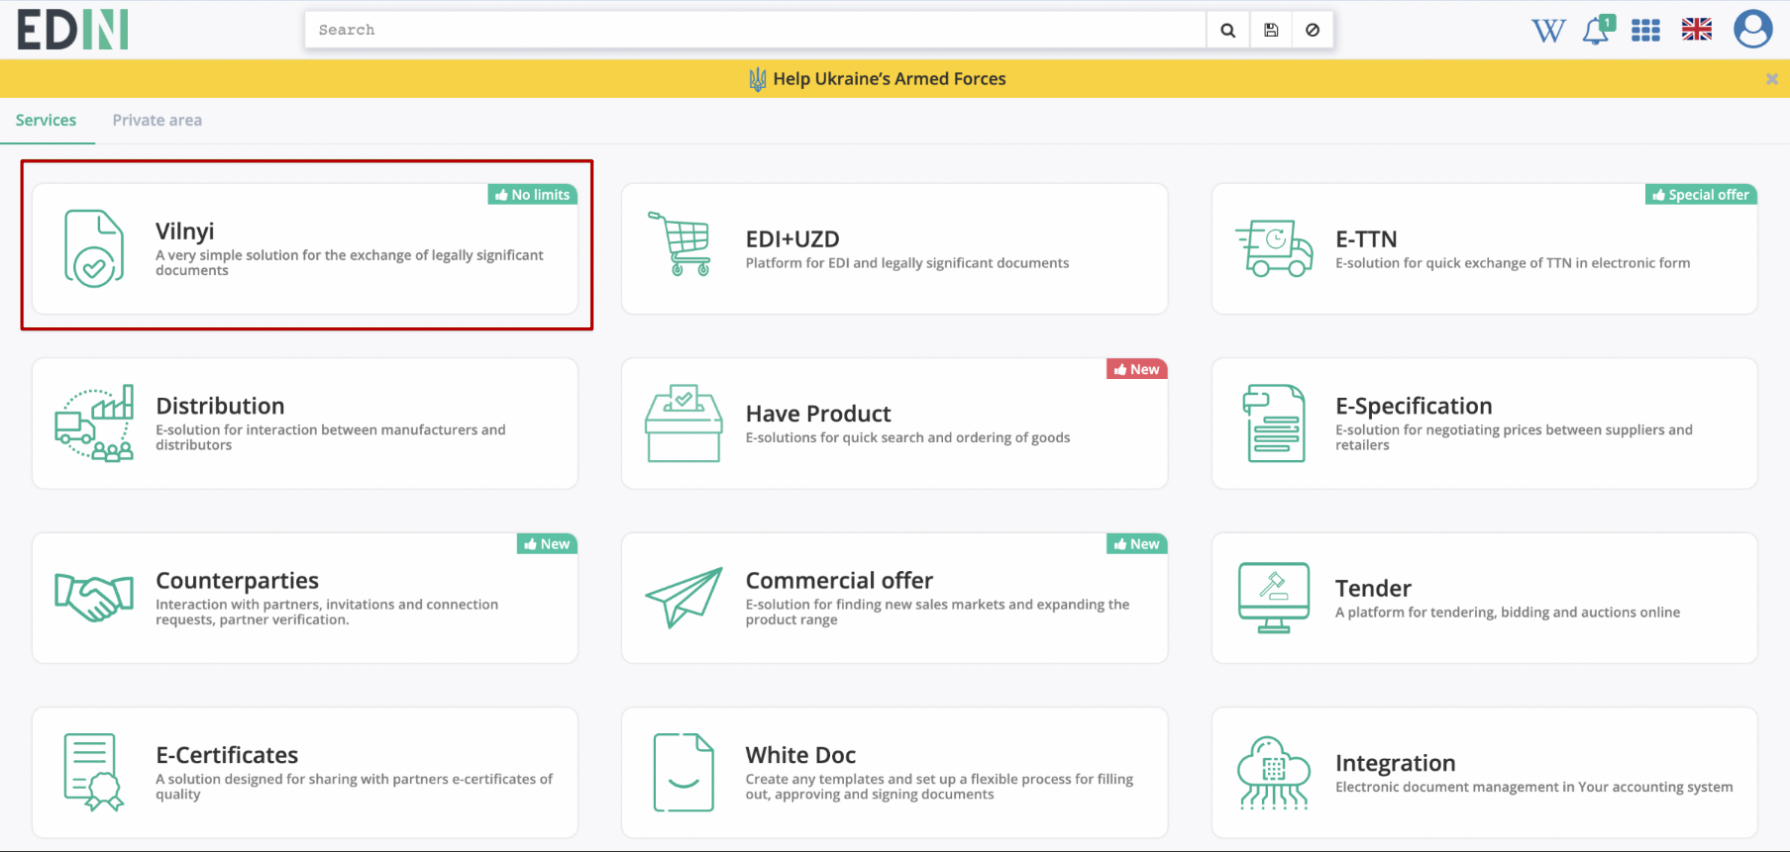
After confirming the email, access to the “Vilnyi” service is opened. Thus, it is already possible to share free files / documents with your partners, customers, suppliers.
Note
You can go to a separate service for electronic document exchange – “WhiteDoc”. The service requires separate registration.
To access all other services and personal cabinet (private area) you need to create an account. To do this, click on the desired service and fill out the registration form.
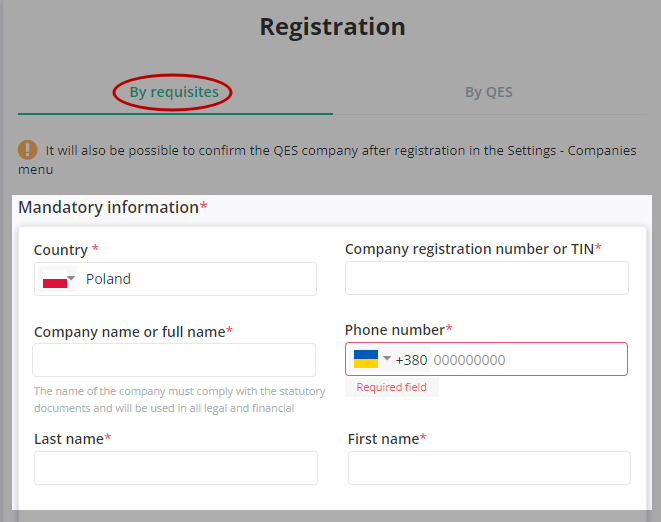
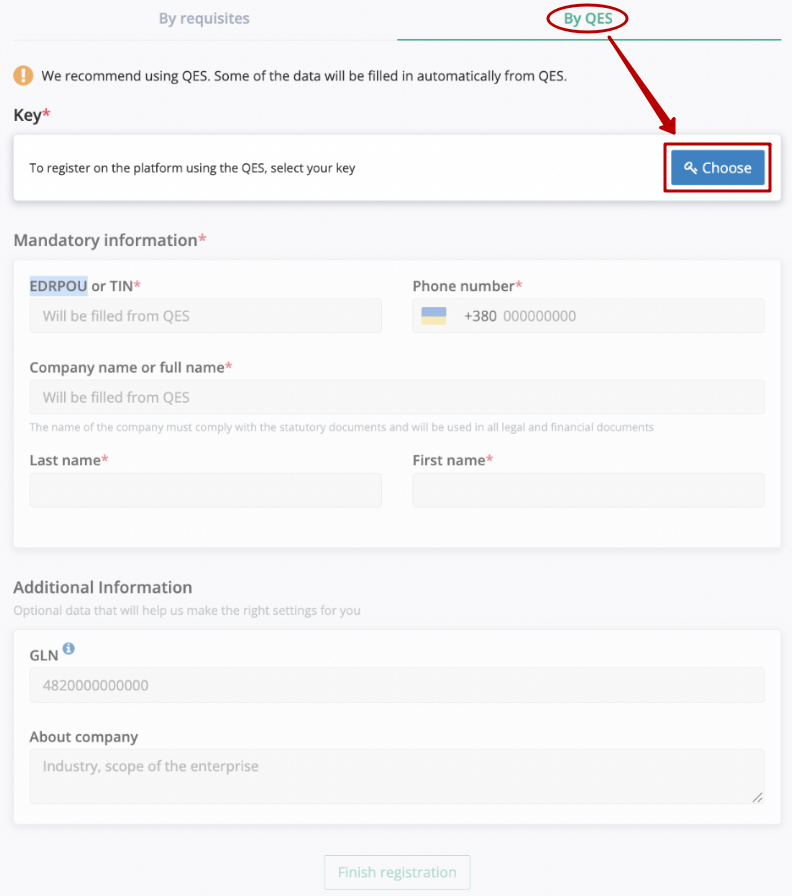
Personal data forms can be entered using the Qualified Electronic Signature - tab “For QES” (available and recommended only for Ukrainian companies) and manually - tab “By requisites”:
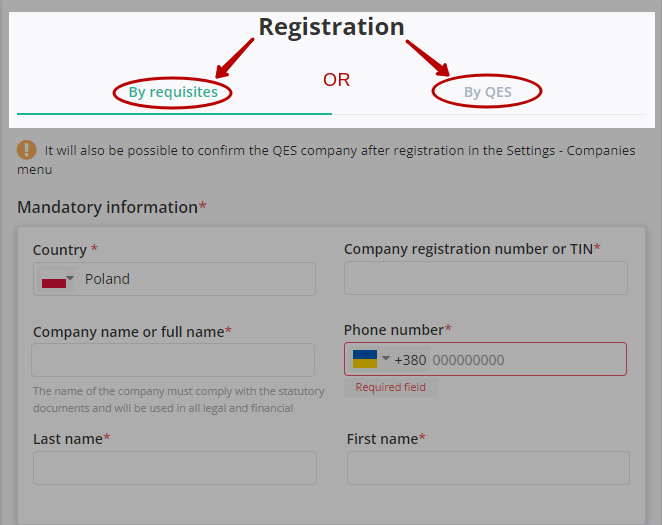
2.1 Registration by requisites
When registering according to the details you need to fill in all required fields marked with a red asterisk * (block “Mandatory information”):
The form must be filled in:
Company country - used to verify the correctness of the entered data;
Registration number of the company or individual entrepreneur - used for check correctly input, creation and verification of documents;
Company name or NPE - used to display in documents;
Phone - specify the contact phone number of the company that can be contacted to inform or resolve financial, commercial, technical issues;
Last name and first name - indicate how you can be contacted.
Note
Additionally, you can specify your GLN on the form, if you have one. If there is no GLN - the field is not filled in, the GLN will be created automatically (you can view all GLNs in the appropriate section of the personal account).
You can also provide additional information about the company on the form. This information is used to find your company by other platform customers. For European countries it is possible to specify the EORI and VAT number:

To complete the registration you need to click “Finish registration”:
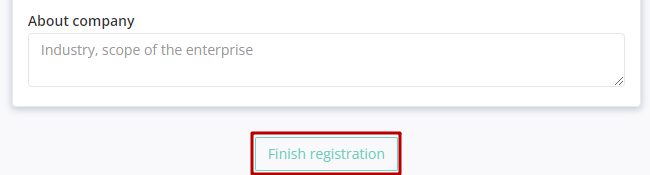
The registered user becomes the owner of the account and is given maximum authority to manage the account.
2.2 Registration by QES
Important
Only Ukrainian companies can register using QES (Qualified Electronic Signature).
In order to enter data using the QES you need to “Choose” a key:
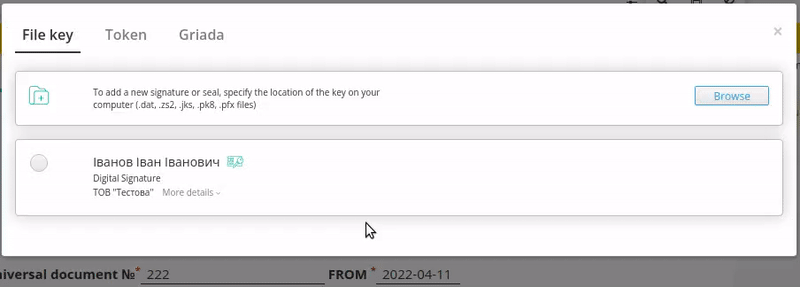
After initializing the signing library, the system will be able to add a file key. With first signing in the modal window you need to select a file (1), enter the password (2) and press “Browse” (3) key to sign:

Hint
Types of electronic signature files:
АЦСК “Україна” secret key signature files have the extension .ZS2 and the following values in file names:
Director «DS»
Accountant «BS»
Employee «SS»
Signet «S»
Encryption «C»
Universal key for printing and encryption «U»
АЦСК “ПриватБанк” secret key signature files have the extension .jks. Others АЦСК secret key signature files mostly have the extension Key-6.dat.

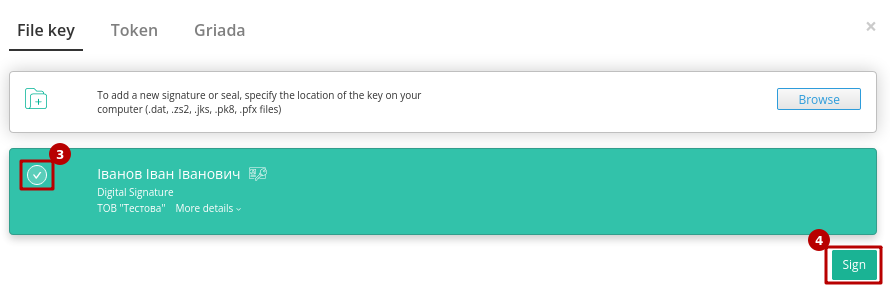
The person whicj perform signing will be automatically displayed when the key is successfully added. The user can add several keys - to select the desired signing for the operation, you need to check the box with the left mouse button and click “Sign”:
The signature form opens with the last selected and ready to sign EDS (subject to the validity of the key and the possibility of signing) for all subsequent signatures during this session (before leaving the “EDI NETWORK” platform):
Additionally, in the signing window you can click “More details” to view information about the signatory. You can use the trash can icon ( ) to delete invalid keys.
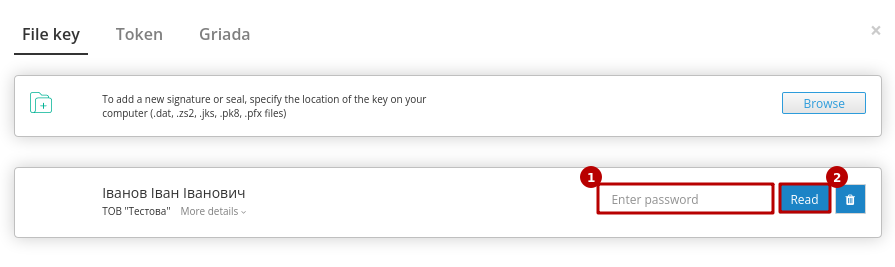
After authorization, only the password for the selected key must be entered for further signing with the previously added key(s):
Full instructions for setting up token signing are available at the following link.
Important
Signing is possible only if your token is physically connected to the device (USB port) from which signing will be performed.
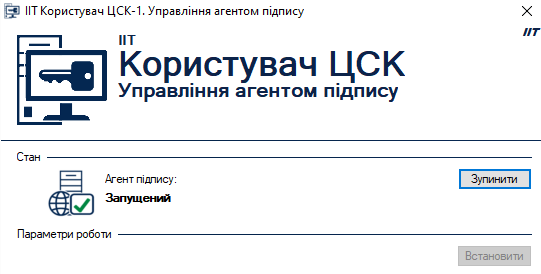
The Користувач ЦСК signature web-library (installed on the computer) must be launched:
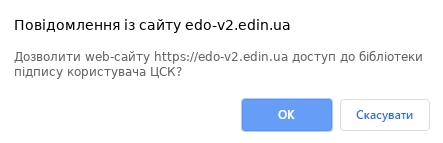
During the initial initialization of the signature library, confirm the permission of the website to the Користувач ЦСК signature library, click — “OK” :
At the first signing in the modal window, you need to “Select Token” (1), choose a key (2), enter a password (3), “Browse” (4) and “Add” (5) active key:
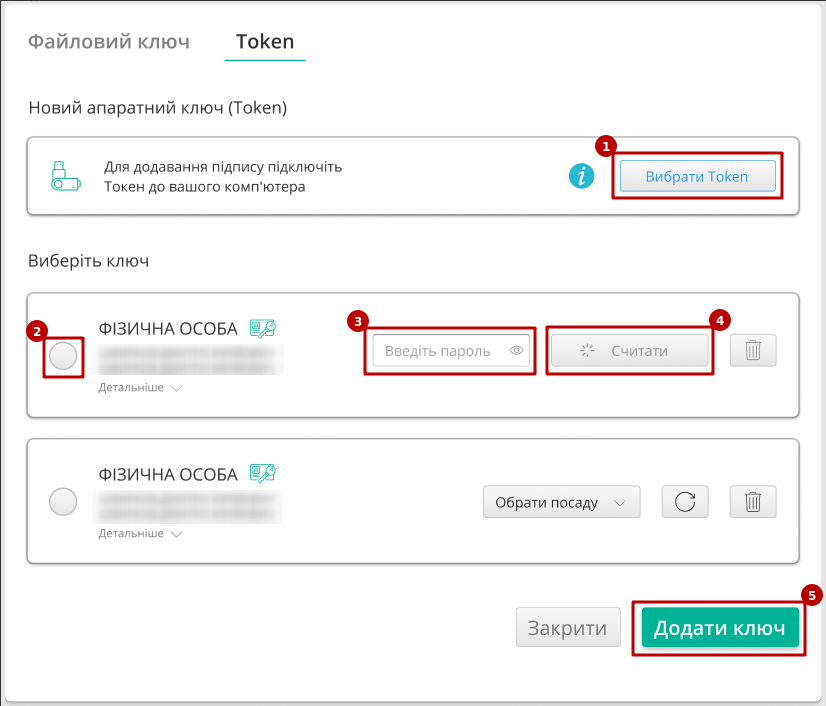
The user may have several keys added - to select the one required for the signing operation, you need to mark it with the left mouse button and press “Sign”:

Warning
If signing with this key has already been done or inconsistency of EDRPOU/TIN data is found (verification), then signing is blocked, and the user is given the appropriate message:

Additionally, in the signing window you can click “More details” to view information about the signatory. You can use the trash can icon () to delete invalid keys.
When working with the previously added key/s, you only need to enter the password for the selected key (steps 2-4 at the figures).
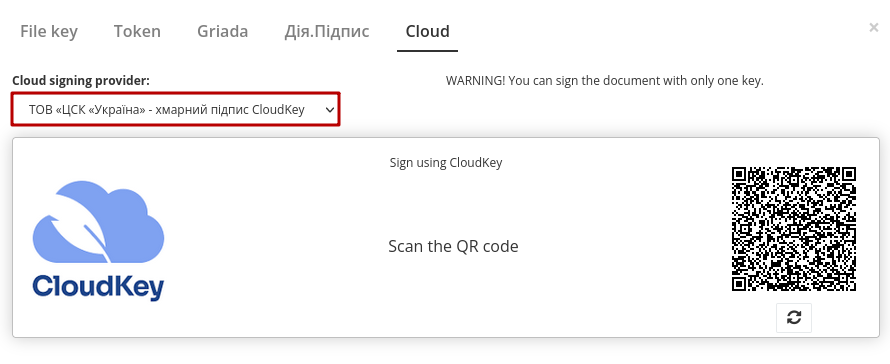
With cloud signing (Cloud tab) are available for use:
ТОВ «ЦСК «Україна» - хмарний підпис “CloudKey”
Приватбанк - хмарний підпис “SmartID”

Note
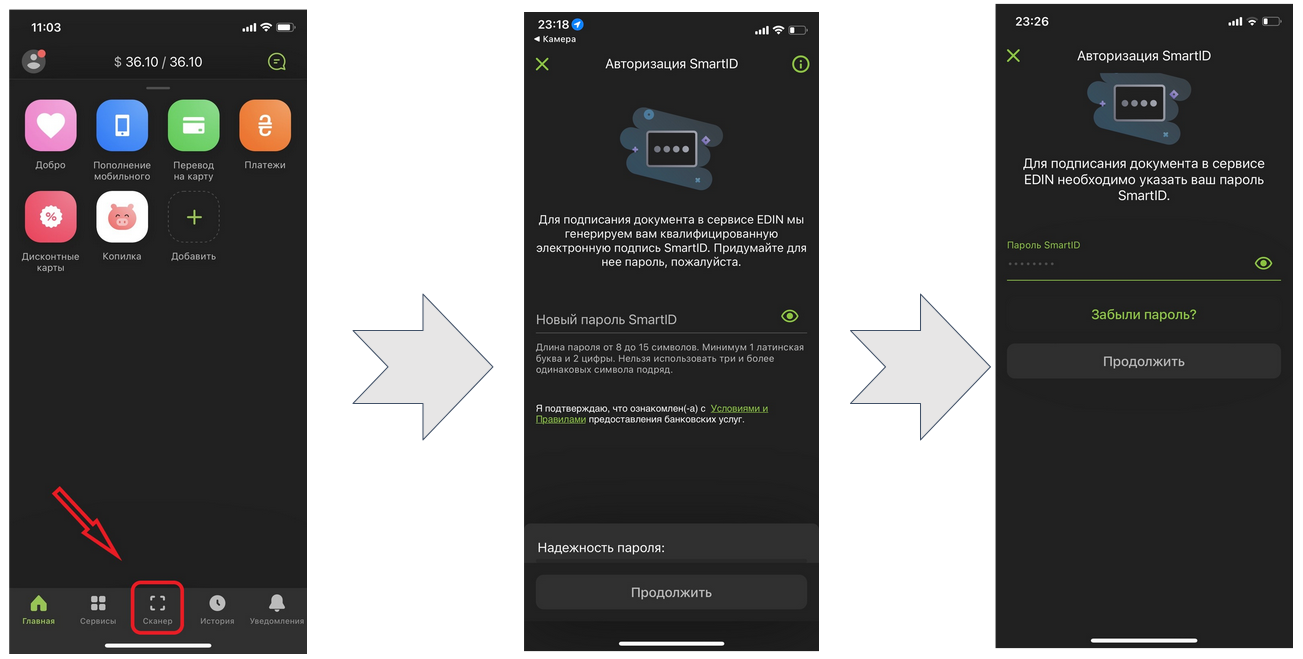
Cloud signing requires a mobile with a pre-installed app from the relevant signing provider!
Attention
You can sign a document only with one key (that means that signing a single document with a Signature and Seal will not work).
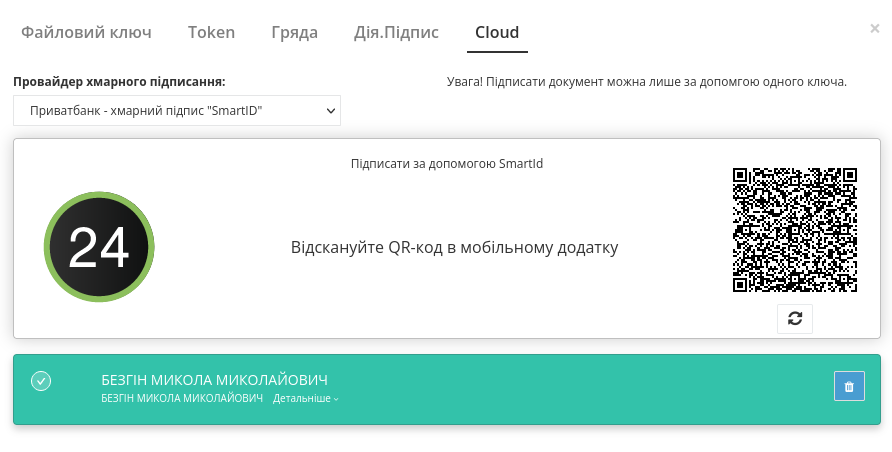
After you have chosen a cloud signing provider, a qr-code is generated to go to the mobile application of the signing provider.

In order to sign a document on the EDIN 2.0 platform, you need to read the qr-code in the “Privat24” mobile application using the “Scanner” (requires the use of a camera) and pass the “SmartID” authorization:
EDIN 2.0 platform will automatically pull up your QES. You must select the added QES and “Sign”:
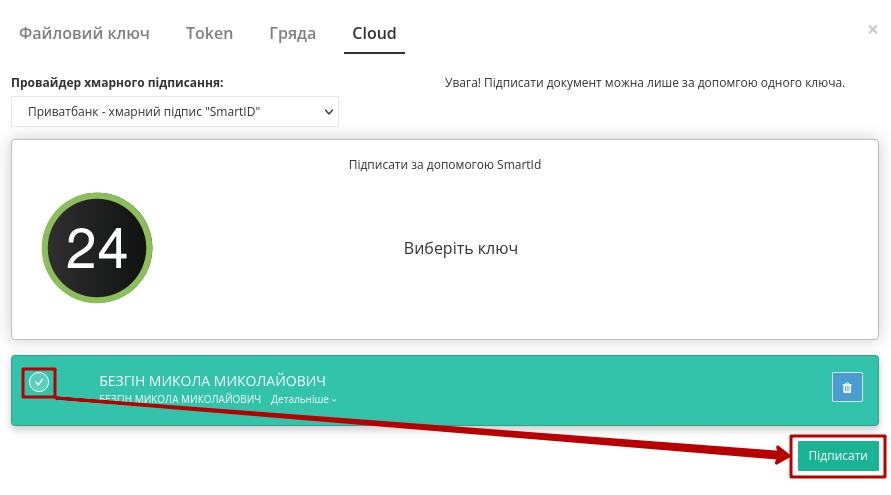
Next, you need to scan the qr-code again in the “Privat24” mobile application (described above).
The document is signed.
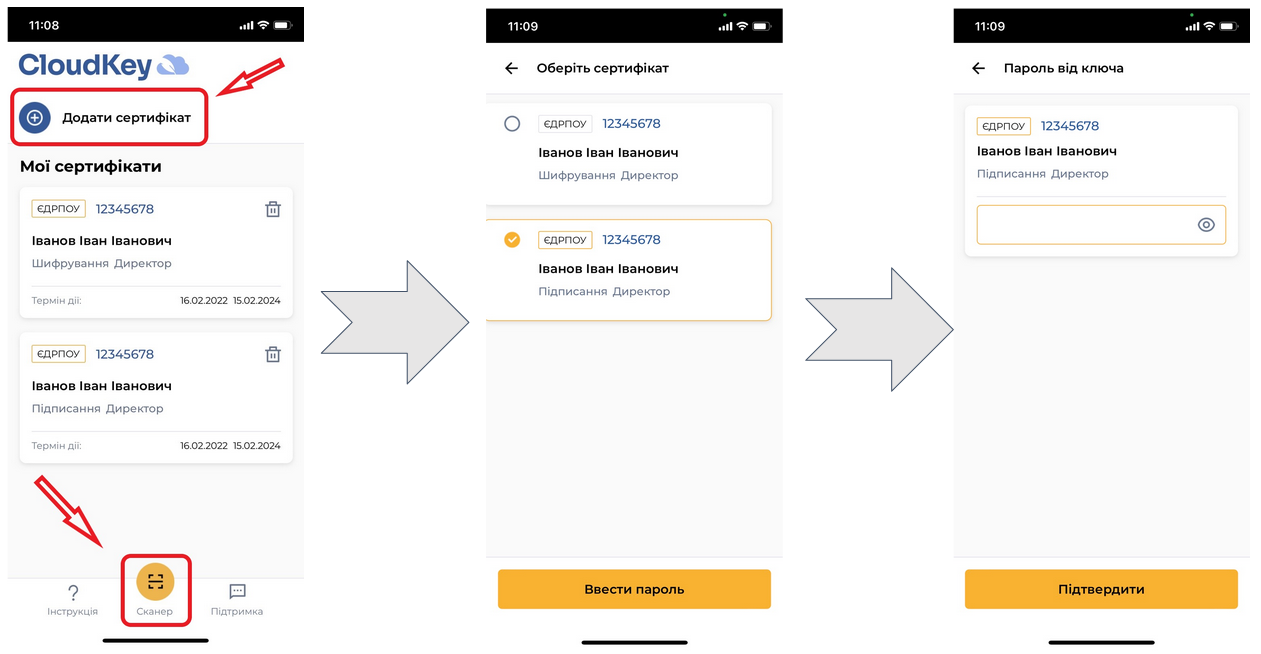
In the “CloudKey” application, you need to “Add a certificate” (initial settings). In order to sign a document on the EDIN 2.0 platform, you need to read the qr-code in the “CloudKey” mobile application using the “Scanner” (requires the use of a camera), select QES for signing, “Enter password” and “Confirm” signing action:
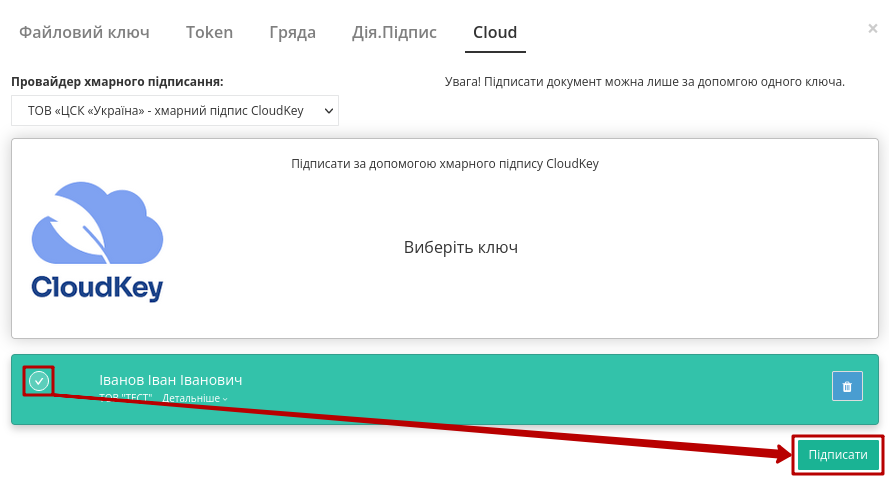
EDIN 2.0 platform will automatically pull up your QES. You must select the added QES and “Sign”:
Next, you need to scan the qr-code again in the “CloudKey” mobile application (described above).
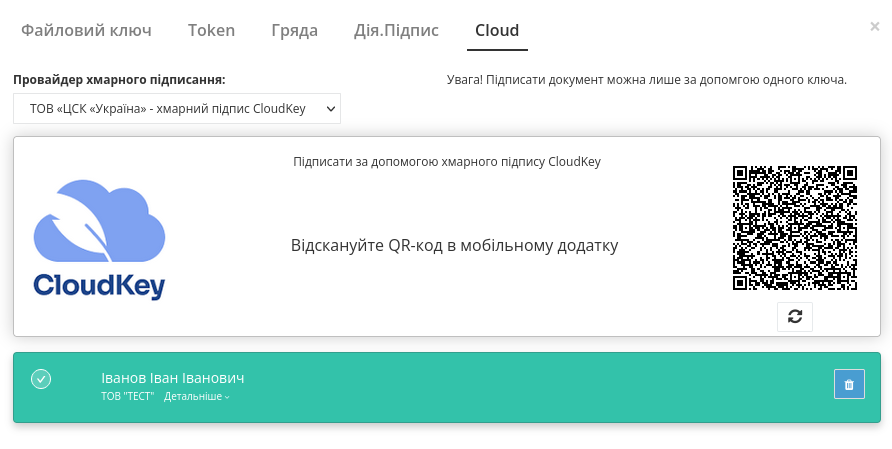
The document is signed.
When the key is successfully read on the registration form, the fields “EDRPOU or TIN” and “Company name or full name” are automatically filled in with data from the key without the possibility of editing them:
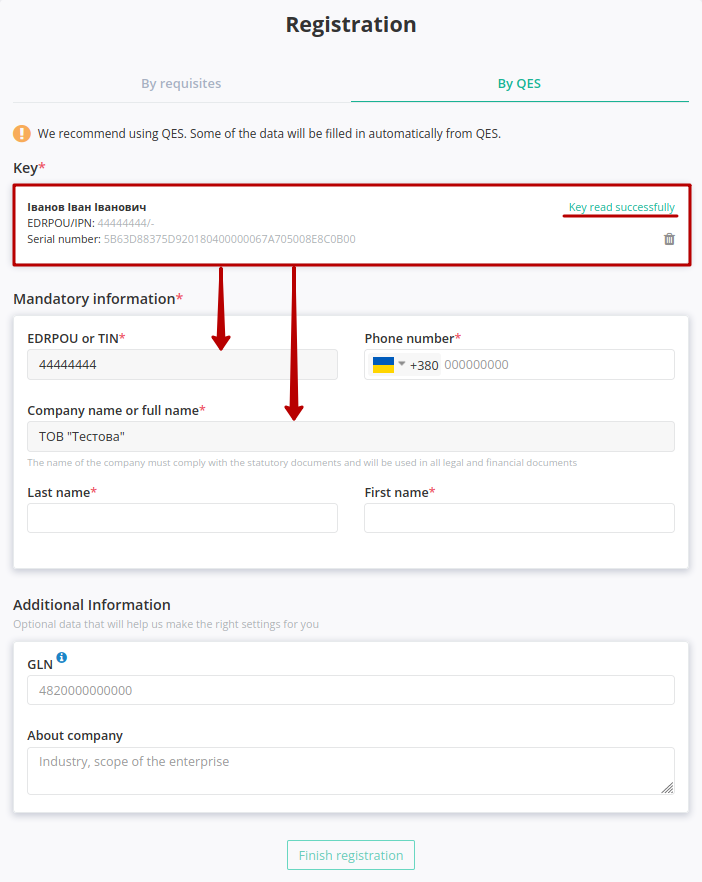
When registering using QES you need to fill in all required fields marked with a red asterisk *:
The form must be filled in:
Company country - used to verify the correctness of the entered data;
Registration number of the company or individual entrepreneur - used for check correctly input, creation and verification of documents;
Company name or NPE - used to display in documents;
Phone - specify the contact phone number of the company that can be contacted to inform or resolve financial, commercial, technical issues;
Last name and first name - indicate how you can be contacted.
Note
Additionally, you can specify your GLN on the form, if you have one. If there is no GLN - the field is not filled in, the GLN will be created automatically (you can view all GLNs in the appropriate section of the personal account).
You can also provide additional information about the company on the form. This information is used to find your company by other platform customers. For European countries it is possible to specify the EORI and VAT number:
To complete the registration you need to click “Finish registration”:
The registered user becomes the owner of the account and is given maximum authority to manage the account.
2.3 Join an existing account
Attention
The account holder will be sent a new user confirming letter to the account if the EDRPOU or TIN code specified at the registration stage is already registered on the platform:

Until the account holder confirms the connection, the registered user does not have access to services other than “Vilnyi”.
Hint
To reduce the waiting time, contact your administrator or contact EDIN technical support.
When the administrator of the company “Add” or “Reject” the registered user a notifying mail will be sent.
3 Recovery/change password
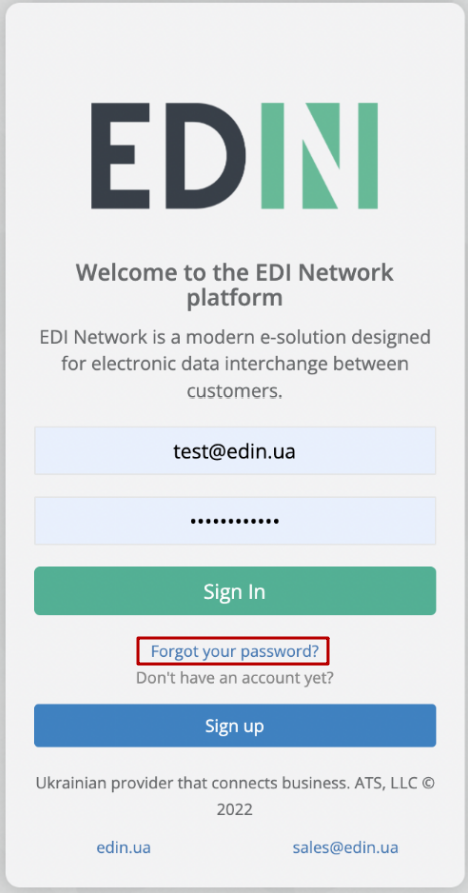
In case you forgot your password, you can recover it. To recover your password, click on “Forgot your password?”:
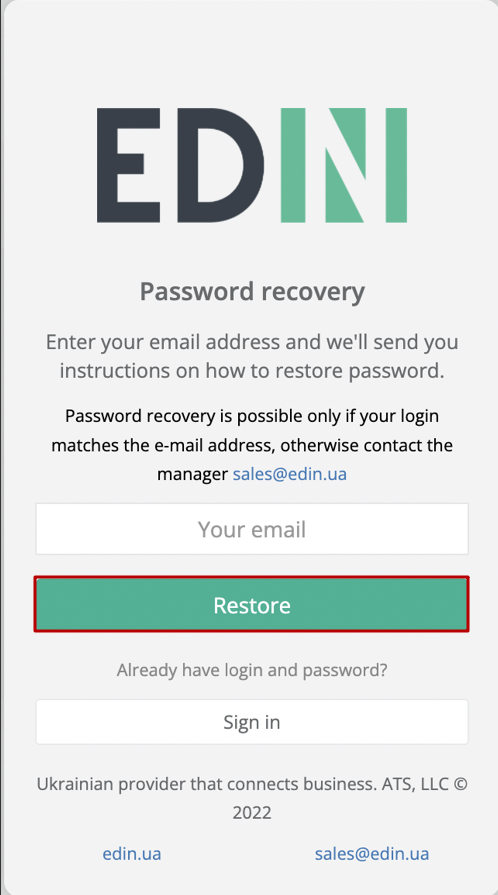
Enter your email on the form and click “Restore”:
Important
Password recovery is possible only for users who use email as a login. Please contact technical support if the login is different from the password recovery email!
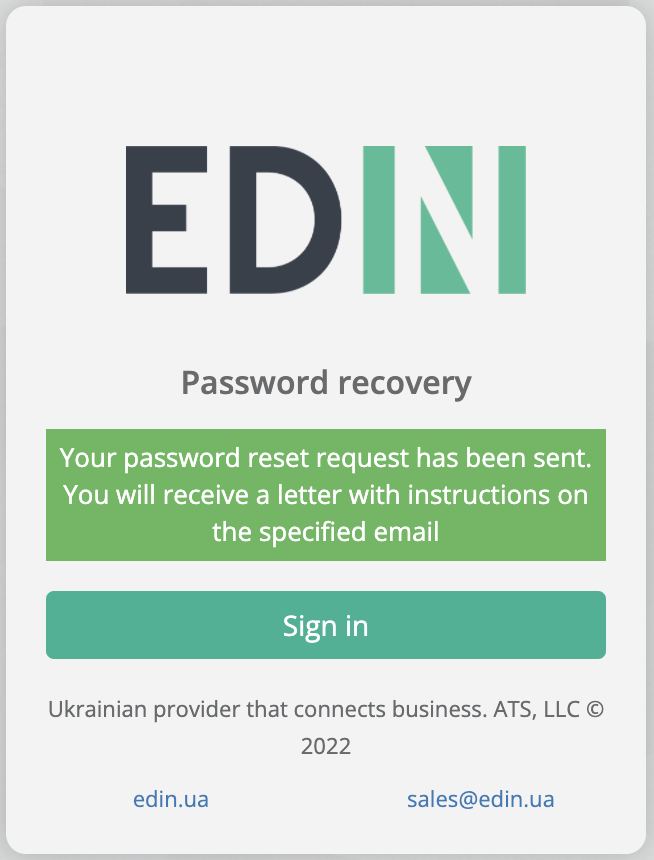
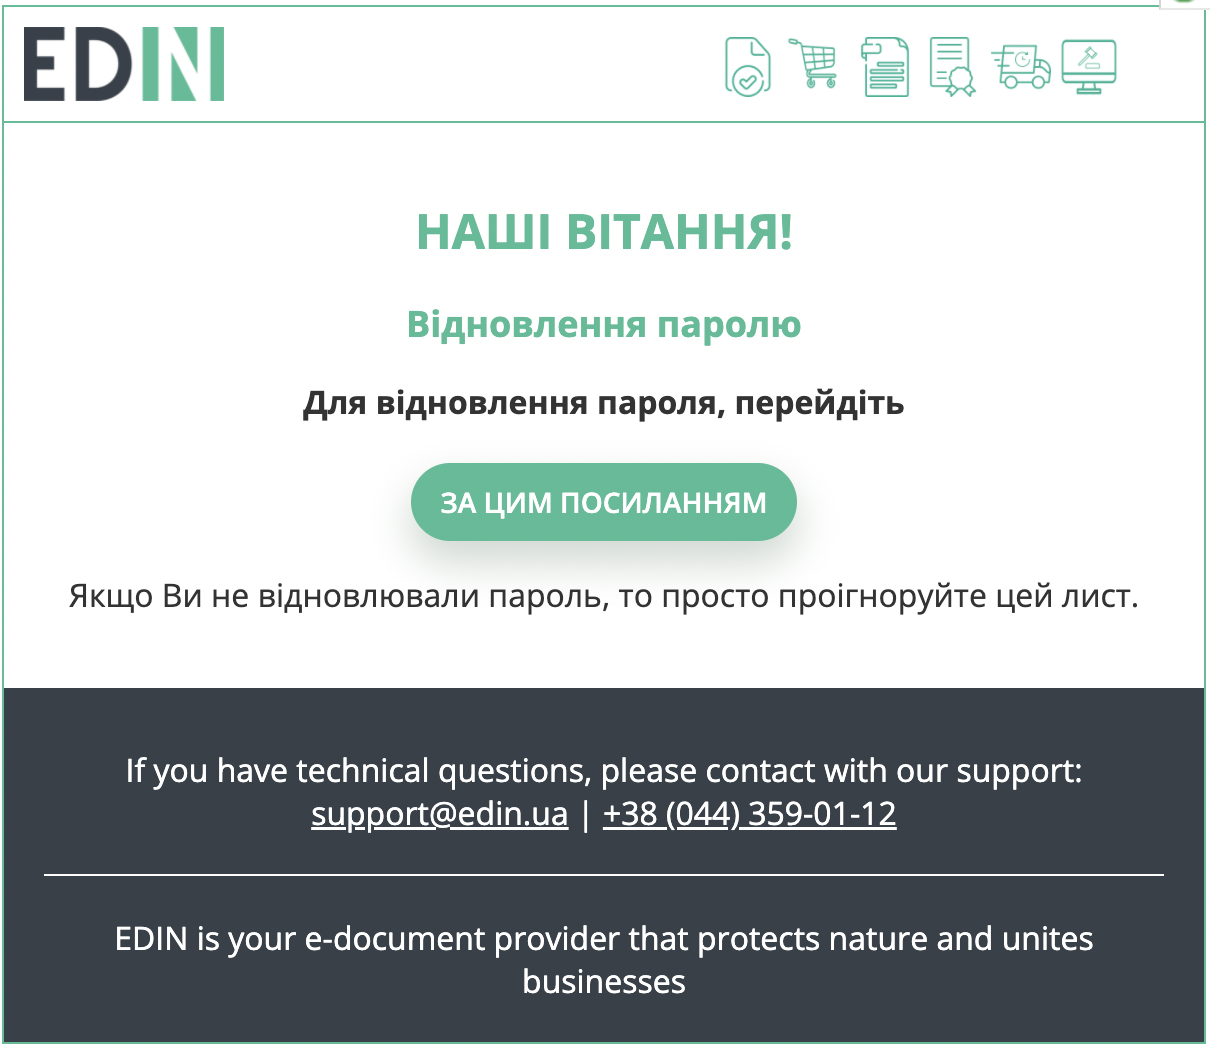
A password recovery instruction will be sent to the specified email:
Get the letter and follow the link in it:
Enter a new password and confirm it:

It’s possible to log in to the EDIN Network platform immediately.
Service support service: support@edin.ua